
| 일 | 월 | 화 | 수 | 목 | 금 | 토 |
|---|---|---|---|---|---|---|
| 1 | 2 | 3 | 4 | 5 | 6 | 7 |
| 8 | 9 | 10 | 11 | 12 | 13 | 14 |
| 15 | 16 | 17 | 18 | 19 | 20 | 21 |
| 22 | 23 | 24 | 25 | 26 | 27 | 28 |
- JS
- SpringBoot
- 스프링
- 스프링부트
- EUREKA
- JavaScript
- 코딩테스트
- map
- leetcode
- Spring Cloud
- 도커
- gitlab
- 프로그래머스
- STS
- 유레카
- 비동기
- OAuth
- spring security
- 자바
- Spring
- 자바스크립트
- date
- spring boot
- 스프링 클라우드
- IntelliJ
- GIT
- jQuery
- map()
- docker
- Java
- Today
- Total
RATSENO
[SpringBoot]SpringBoot 2.2.x 버전 Junit5에서 Junit4로 변경 본문
SpringBoot 2.2.x 버전이 release 되면서 예전의 SpringBoot에서 Junit4 버전이 Junit5이 기본으로 변경되었습니다.
그래서 Junit4로 테스트 실습을 진행하는 와중에 제대로 import 하여 사용하지 못하고,
익숙하지 않아 실습하는데 어려움을 겪었습니다. 아직은 Junit4도 익숙하지 않기때문에 Junit4로 변경해보겠습니다.
먼저 용어부터 정리하고 들어가는 것이 좋을 것 같습니다. 아래의 그림을 봐주세요

위 그림의 왼쪽은 Junit4, 오른쪽은 Junit5의 대략적인 모듈의 모습입니다.
우리가 알아두면 좋을것은
- Junit4 >>>>> vintage-engine
- Junit5 >>>>> jupiter-engine
을 사용한다는 것만 알고계시면 SpringBoot 2.2.x 버전에서 Junit4로 변경할때 헷갈리지 않으실 것 같습니다.
SpringBoot 2.2.x 버전으로 프로젝트를 생성해보겠습니다.
를 이용하여 생성하겠습니다.

위와 같이 생성하여 다운받은 zip 파일을 압축 해제하면 간단하게 Spring Boot프로젝트를 생성할 수 있습니다.
압축을 풀고 폴더를 각자 사용하고 있는 ide를 이용하여 열어봅시다.

위의 빨간색 상자가 기본적으로 생성되는 main 클래스와 test 클래스입니다.
Spring Initializr를 통하여 프로젝트를 생성하게되면 아래와 같이 추가한
<artifactId> spring-boot-starter-web </artifactId> 의존성과자동으로 추가되는
<artifactId>spring-boot-starter-test</artifactId> 테스트와 관련된 의존성이 자동으로 pom.xml에 추가됩니다.
<?xml version="1.0" encoding="UTF-8"?>
<project xmlns="http://maven.apache.org/POM/4.0.0" xmlns:xsi="http://www.w3.org/2001/XMLSchema-instance"
	xsi:schemaLocation="http://maven.apache.org/POM/4.0.0 https://maven.apache.org/xsd/maven-4.0.0.xsd">
	<modelVersion>4.0.0</modelVersion>
	<parent>
		<groupId>org.springframework.boot</groupId>
		<artifactId>spring-boot-starter-parent</artifactId>
		<version>2.2.4.RELEASE</version>
		<relativePath/> <!-- lookup parent from repository -->
	</parent>
	<groupId>com.example.ratseno</groupId>
	<artifactId>spring-boot-test</artifactId>
	<version>0.0.1-SNAPSHOT</version>
	<name>spring-boot-test</name>
	<description>Demo project for Spring Boot</description>

	<properties>
		<java.version>1.8</java.version>
	</properties>

	<dependencies>
		<dependency>
			<groupId>org.springframework.boot</groupId>
			<artifactId>spring-boot-starter-web</artifactId>
		</dependency>

		<dependency>
			<groupId>org.springframework.boot</groupId>
			<artifactId>spring-boot-starter-test</artifactId>
			<scope>test</scope>
			<exclusions>
				<exclusion>
					<groupId>org.junit.vintage</groupId>
					<artifactId>junit-vintage-engine</artifactId>
				</exclusion>
			</exclusions>
		</dependency>
	</dependencies>

	<build>
		<plugins>
			<plugin>
				<groupId>org.springframework.boot</groupId>
				<artifactId>spring-boot-maven-plugin</artifactId>
			</plugin>
		</plugins>
	</build>

</project>
<artifactId> spring-boot-starter-test </artifactId> 부분을
처음에 설명드린 vintage-engine가 <exclusions></exclusions>로 제외되어있는 것을 확인할 수 있습니다.
이 부분 때문에 Test 파일로 생성된 클래스에서 Jnit5 api만 import가 가능하게 되어 junit4를 쓸 수 없게 됩니다.
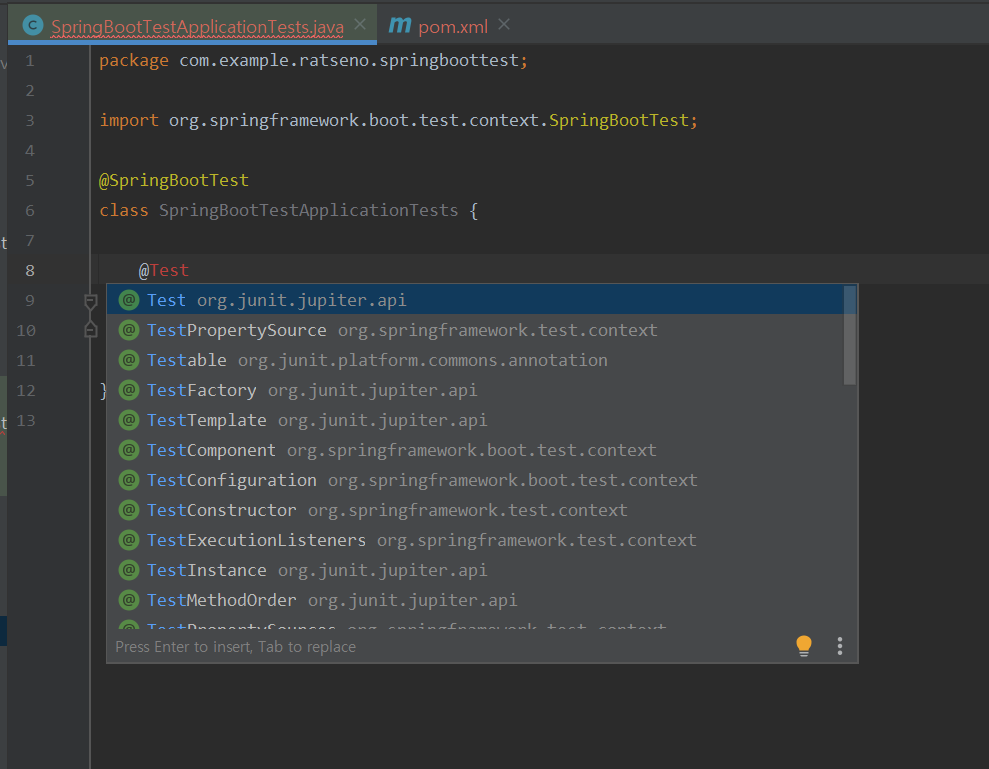
Junit4를 사용하기 위해서는 pom.xml에서 <exclusions></exclusions>을 삭제하면 됩니다.!
<?xml version="1.0" encoding="UTF-8"?>
<project xmlns="http://maven.apache.org/POM/4.0.0" xmlns:xsi="http://www.w3.org/2001/XMLSchema-instance"
	xsi:schemaLocation="http://maven.apache.org/POM/4.0.0 https://maven.apache.org/xsd/maven-4.0.0.xsd">
	<modelVersion>4.0.0</modelVersion>
	<parent>
		<groupId>org.springframework.boot</groupId>
		<artifactId>spring-boot-starter-parent</artifactId>
		<version>2.2.4.RELEASE</version>
		<relativePath/> <!-- lookup parent from repository -->
	</parent>
	<groupId>com.example.ratseno</groupId>
	<artifactId>spring-boot-test</artifactId>
	<version>0.0.1-SNAPSHOT</version>
	<name>spring-boot-test</name>
	<description>Demo project for Spring Boot</description>

	<properties>
		<java.version>1.8</java.version>
	</properties>

	<dependencies>
		<dependency>
			<groupId>org.springframework.boot</groupId>
			<artifactId>spring-boot-starter-web</artifactId>
		</dependency>

		<dependency>
			<groupId>org.springframework.boot</groupId>
			<artifactId>spring-boot-starter-test</artifactId>
			<scope>test</scope>
		</dependency>
	</dependencies>

	<build>
		<plugins>
			<plugin>
				<groupId>org.springframework.boot</groupId>
				<artifactId>spring-boot-maven-plugin</artifactId>
			</plugin>
		</plugins>
	</build>

</project>
위와 같이 pom.xml을 수정하고 Test클래스로 이동하여 자동완성을 실행해봅시다.
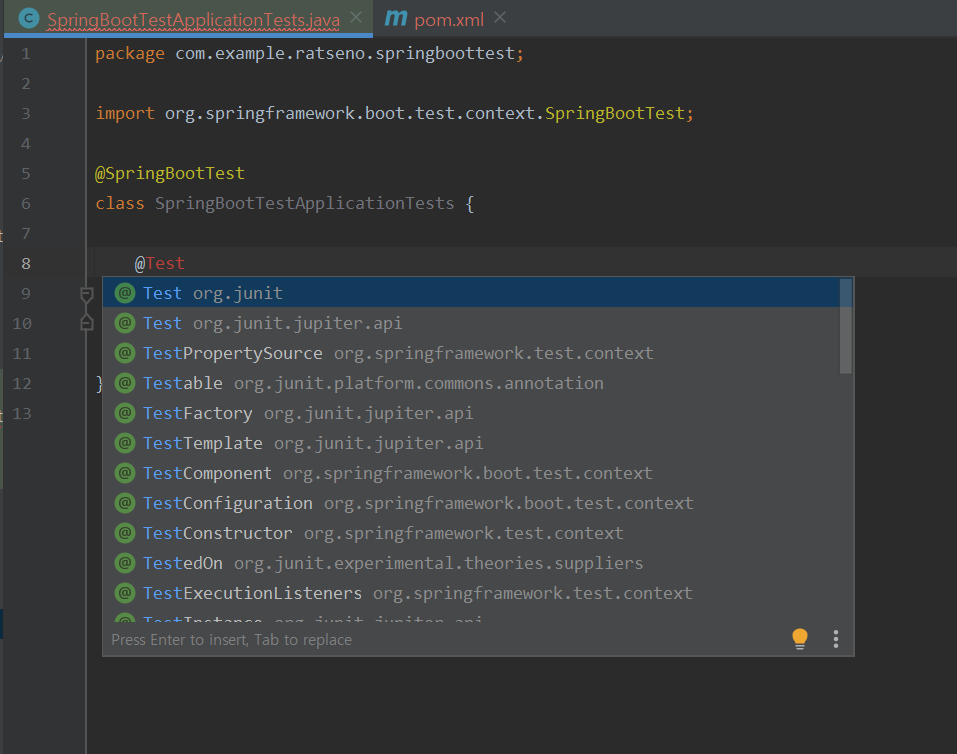
위와 같은 Junit4의 @Test를 사용할 수 있게 변경된 것을 알 수 있습니다.
부족한 포스팅 봐주셔서 감사합니다. 조금이라도 도움이 되었으면 좋겠습니다!
틀린부분은 언제나 환영합니다...!
'DEV > SPRING' 카테고리의 다른 글
| [SpringBoot]Spring Boot Security + OAuth 2.0 [Authorization code grant] (2) (0) | 2020.09.14 |
|---|---|
| [SpringBoot]Spring Boot Security + OAuth 2.0 [Authorization code grant] (1) (0) | 2020.09.14 |
| [SpringBoot]자동 설정 이해 (0) | 2020.02.24 |
| [SpringBoot]SpringBoot 프로젝트 생성 (0) | 2020.02.19 |
| [Spring]Springboot + websocket 채팅[2] (9) | 2020.02.18 |


